Price: $39.99
(as of Apr 28, 2025 05:24:45 UTC – Details)
From the brand


Photography Light
Light & Tripod
Background Stand & Tripod
Tripod & Stand
Lavalier Microphone
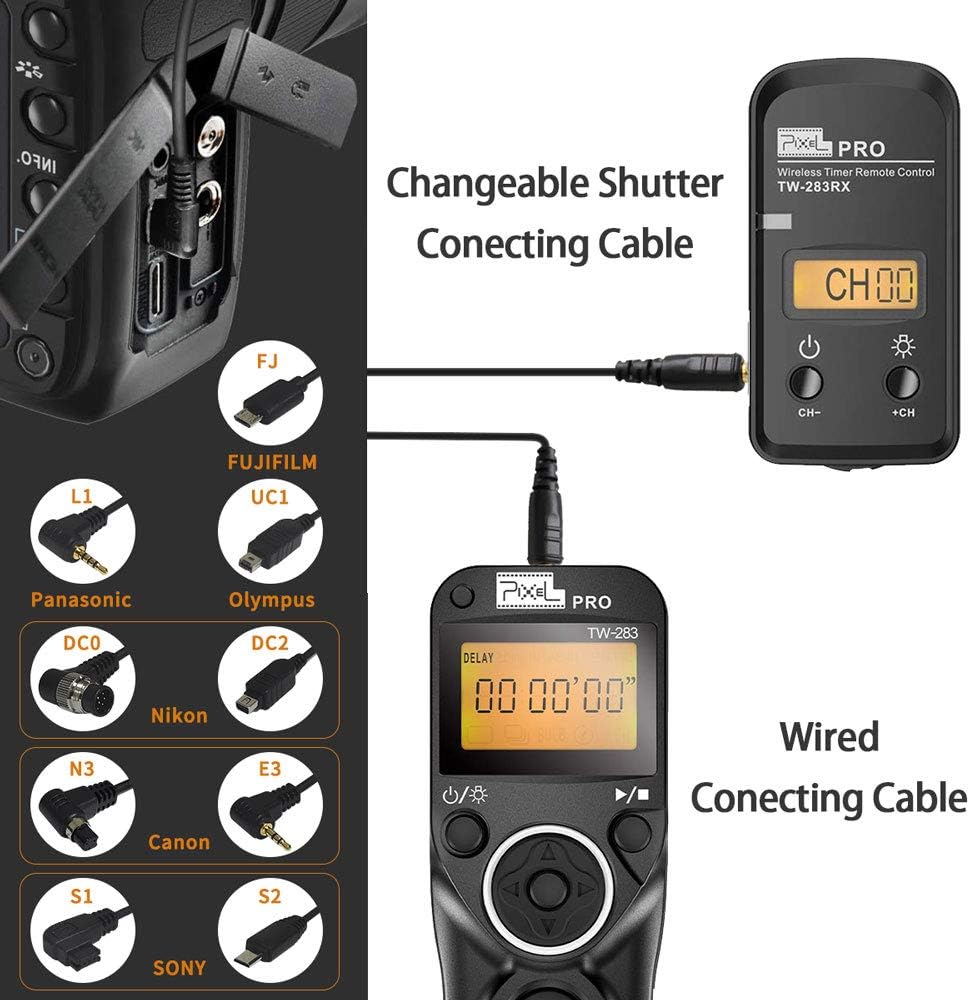
Compatible for Canon EOS R100, EOS R8, EOS R7, EOS R6 Mark II, EOS R10, EOS R6, EOS R, EOS RA, EOS RP, 850D, 90D, 80D, 70D, 77D, 60D, 60Da, 250D, 200D, 200DII, 100D, 800D, 760D, 750D, 700D, 650D, 600D, 550D, 500D, 450D, 400D, 1500D, 1300D, 1200D, 1100D, 1000D, 2000D, M5, M6, M6 Mark II; PowerShot SX50HS, SX60HS, SX70HS, G1X Mark III, G1X Mark II, G1X, G3X, G5X, G10, G11, G12, G15, G16; Rebel: XT, XTi, XS, XSi, T1i, T2, T2i, T3, T3i, T4, T4i, T5, T5i, T6, T6i, T7, T7i, T8i, SL1 etc
Compatible for Fujifilm X-T5, X-H2, X-H2S, GFX100, GFX100S, GFX50R, GFX50SII, GFX100 IR, X-Pro3, X-T3, X-T4, X-T30, X-T30II, X-A7, X-E1, X100V; Compatible for Samsung: GX-1L, GX-1S, GX-10, GX-20, NX100, NX11, NX10, NX5; Contax: 645, N1, NX, N Digial; Sigma: Sd1; Hassleblad: H series. Compatible for Olympus SYSTEM OM-1, SYSTEM OM-5, E-M1X, E-M1 Mark II, E-M1 Mark III, E-M5 Mark III;
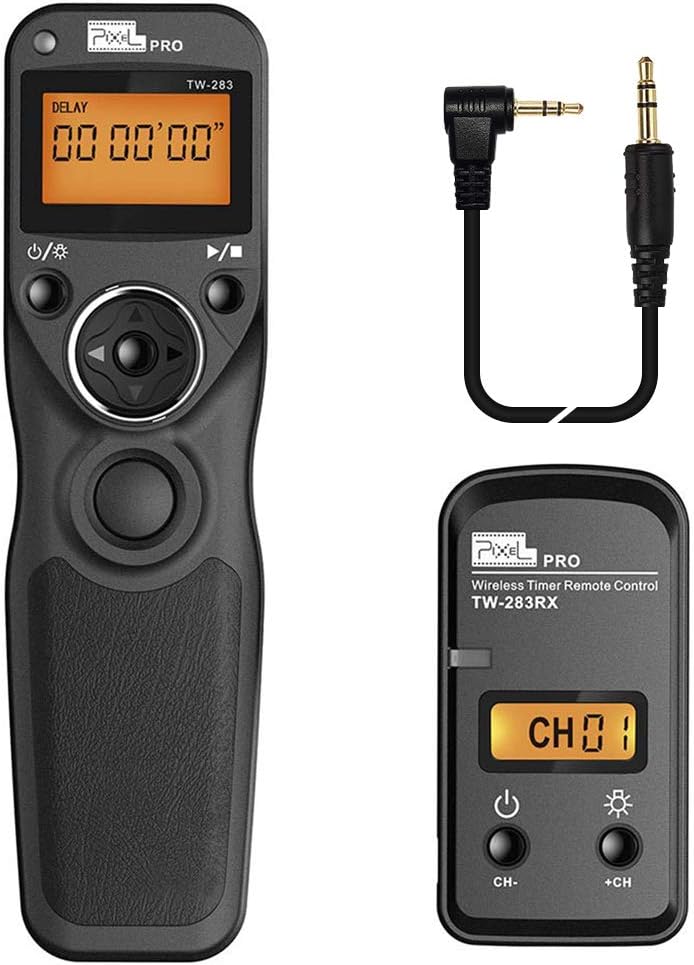
It features no directionality,80M+ remote distance and ultra- powerful anti-interference ability. With 30 channels for options,it can avoid interference caused by other similar devices. Using international 2.4G transmission technology.it’s stable and quick in response to shutter.
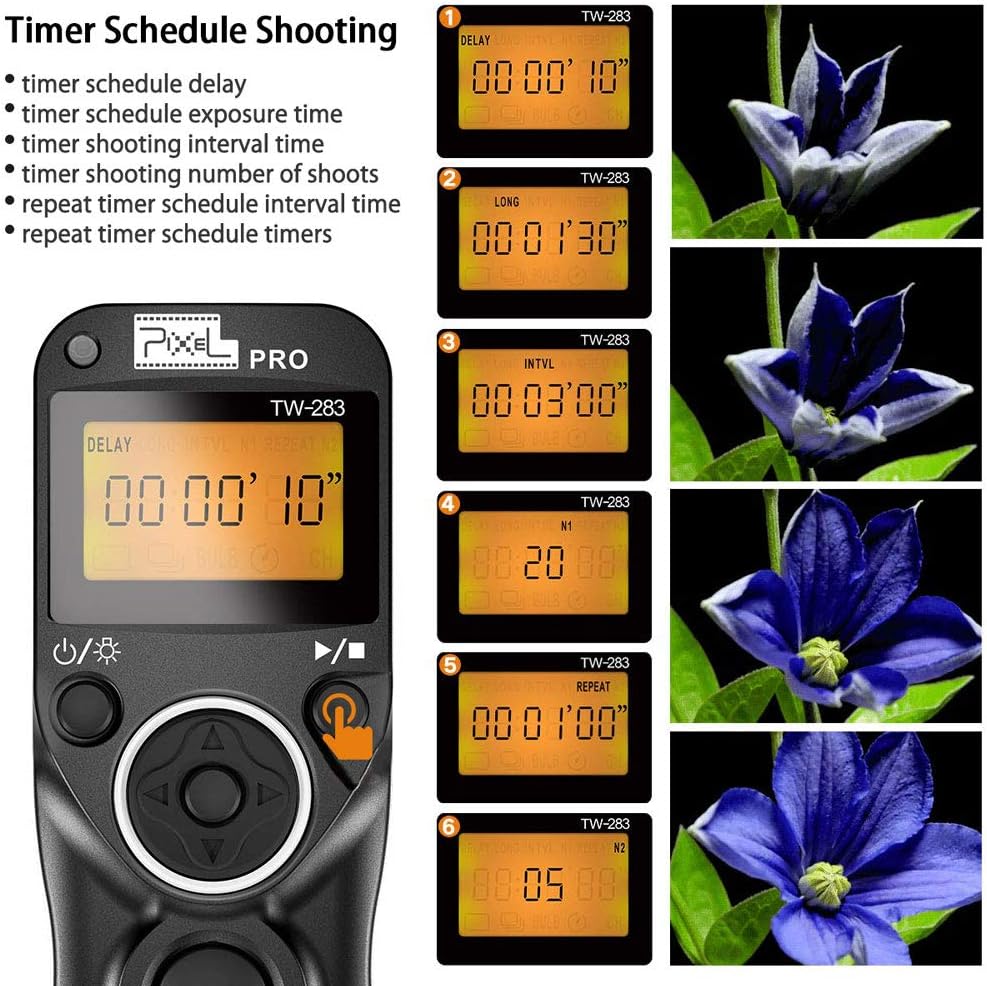
When capturing the beautiful moments of sunrise and sunset and flowers bloom and fade , you don’t need to wait for the whole time . You can set delay timer,exposure time, interval time, number of shoots, repeat shooting interval time and repeat times.
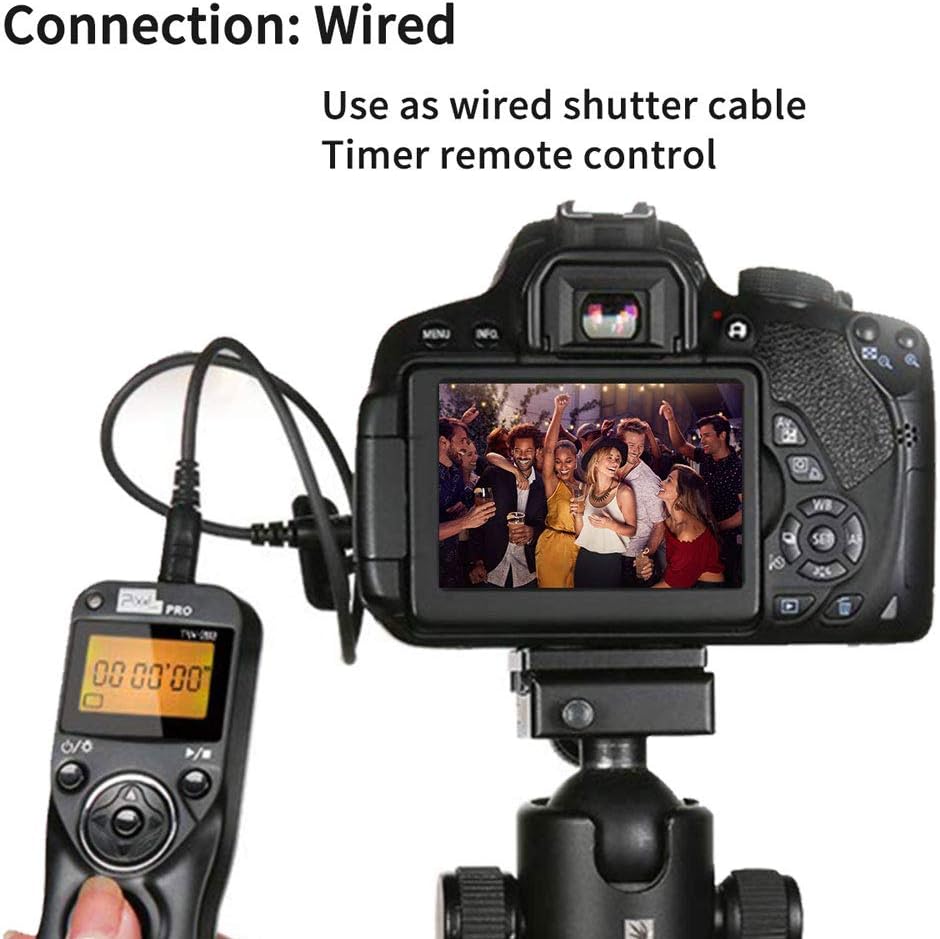
Available to control different brand’s cameras and models by changing different camera connecting cable.The transmitter and receiver adopts LCD screen which is more easy and simple to handle.
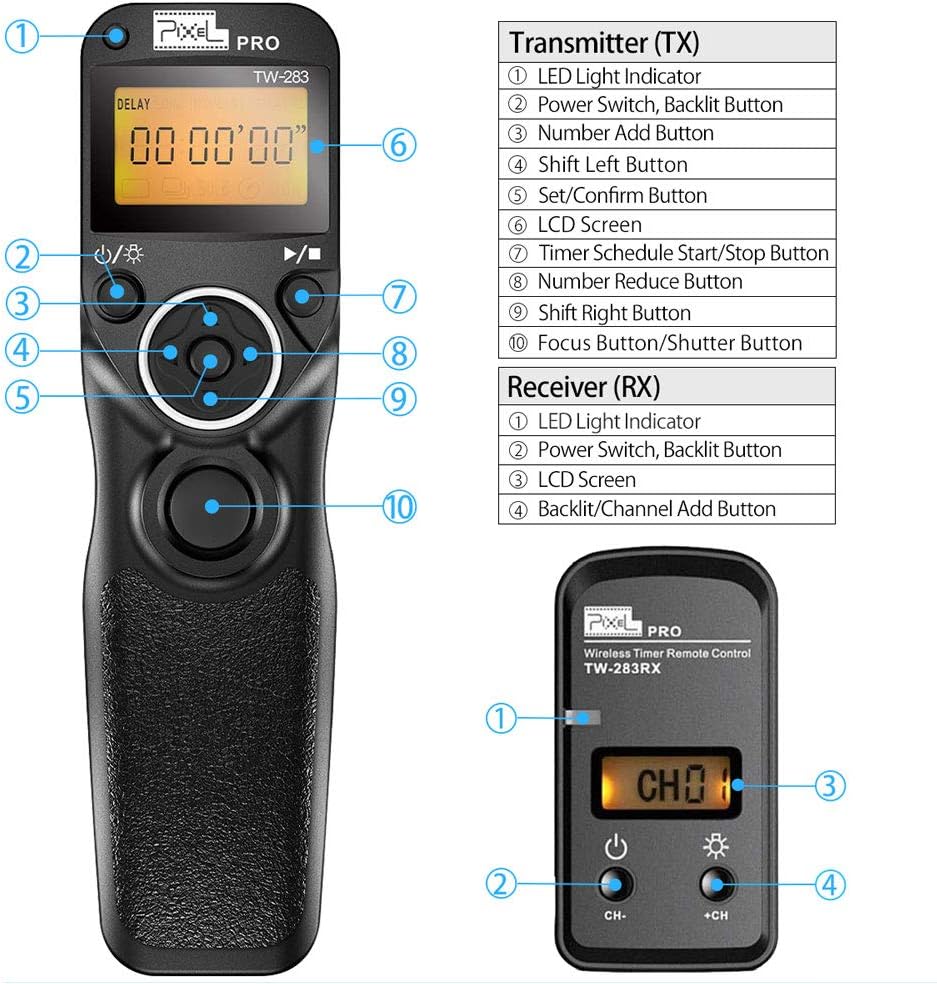
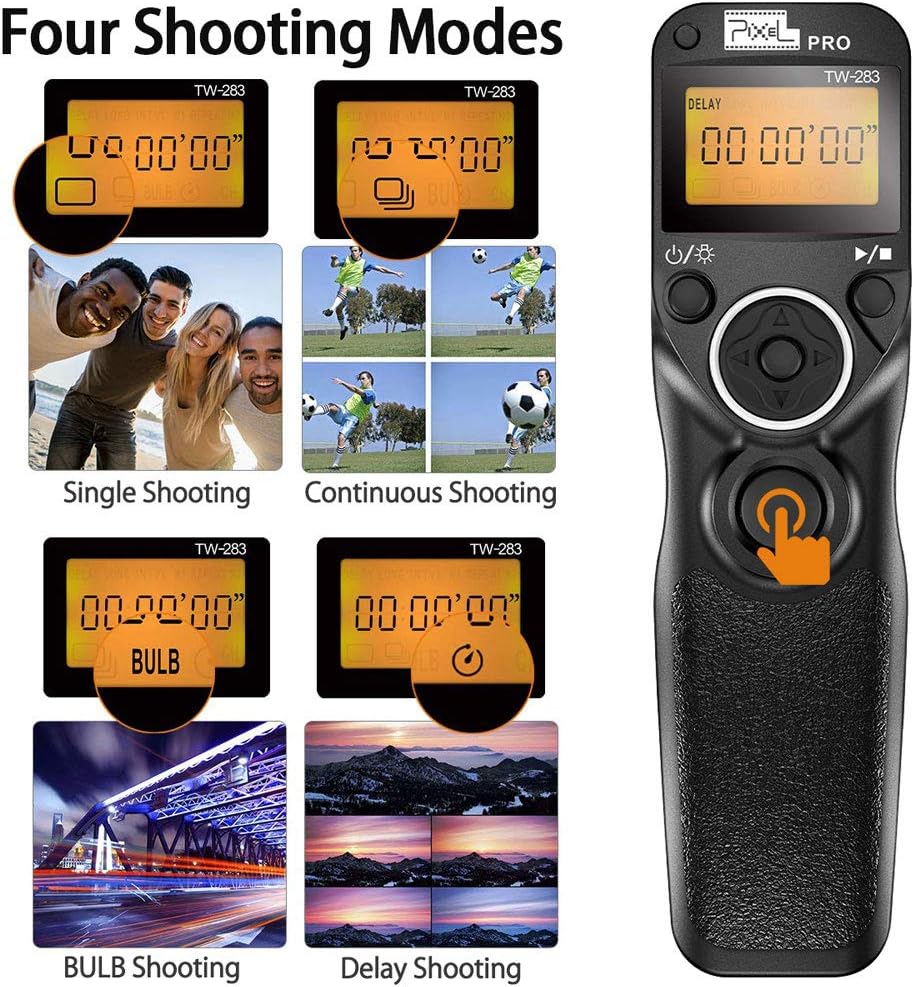
TW-283 supports simple single shooting, 1S continuous shooting, [ BULB ] shooting, delay shooting and timer schedule shooting.Delay Shooting Setting can set delay time and shooting number, the delay time alters from 1s to 59s, shooting number alters from 1 to 99.Timer Schedule shooting time can be set from 0 sec to 99hrs59mins59sec. Shooting number can be set from 1 to 99.
product.”>Details)
Customers say
Customers find the remote control works well with various cameras, including the D800 and Nikon Z, and appreciate its effective range and value for money. The wireless control feature receives positive feedback, with one customer noting they can stroll away from the camera. While some customers find it easy to use and set up, others mention the manual is confusing. The build quality and fit receive mixed reviews, with some praising its construction while others report it falling apart, and several customers note compatibility issues.
AI-generated from the text of customer reviews





Robert Walker –
Great remote.
It works as described, I have used it for several night photo shoots on my Sony a77m2.
Z –
Excellent customer service
A couple of weeks ago, I was able to find the TW-283 multi-functional shutter remote control set that I have purchased 2 years ago in 2022, but have never used. I realized soon that the transmitter and receiver were not communicating so I was unable to trigger a response from my camera. Since it was way from returning or replacing time frame, I was not hopeful when I contacted the seller/manufacturer; I was only hoping for some suggestion on how to operate. If not working, Iâd just get a new one. However, the seller offered me a new replacement after exchanging a few messages, which arrived today and works perfectly. Things could go wrong, but the seller has made extra effort that has shown it is 100% behind its product for its customers. Thanks a lot, NineNine!
BF –
An excellent device with a poor manual
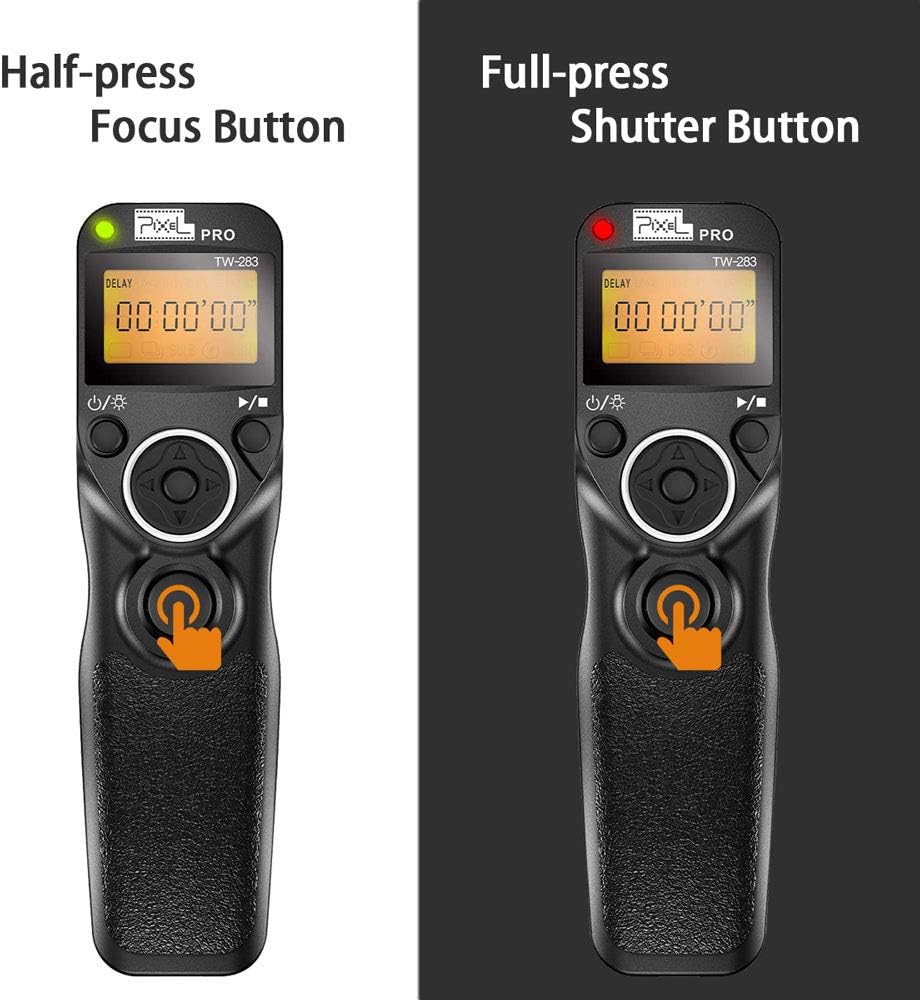
============================================================Pixel TW-283, wireless shutter releaseProduct reviewby BF, 21 June 2019============================================================GENERAL:General fit and finish is very good.Functionality is excellent. The device is usefully versatile.(haven’t tested the wireless range.)The manual is much better than many are, but still is lacking a number of important details, and does a pathetically poor job of explaining the intervalometer function — arguably what should be one of it’s strongest selling points against other wireless-trigger products.TRANSMITTER:The transmitter’s housing has a nice texture, but it is not grippy enough.Once you understand what the buttons and settings mean, they are actually quite easy to use.There are eight buttons. It’s nice that there are enough buttons, with separate functions, to make learning and using them reasonably easy.The transmitter’s main button is too mushy.The diamond-shaped group of buttons are too close together, so it takes care to press just the button you want. And it’s too easy to end up pressing two buttons at once when you only want to press one.The transmitter’s LCD display backlight is pathetically dim.RECEIVER:The receiver’s battery compartment is confusing and very poorly labeled.============================================================Pixel TW-283, wireless shutter releaseOperating Instructionsby BF, 21 June 2019============================================================Fundamentally, the device takes the place of your finger pressing the shutter button. It can simulate a half-press, a full-press, a release, and a click of the shutter button.This device merely actuates the shutter button. You must coordinate the settings of this device with those of the camera to achieve the results you wish.Note that upon initiation of any action, the transmitter downloads instructions to the receiver, and the reciever executes them. In several modes the transmitter will display countdown readouts, but these are just timed displays. Particularly for long sequences, once the sequence is started you can turn the transmitter off and the reciever will continue to execute.Note that the transmitter will allow you to program intervalometer sequences that take longer to execute than the (maximum) 400 hour battery life of the receiver.____________________________________________________________SINGLE MODE (click)SETUP:Select single-click mode.The LCD will display the current wireless channel.OPERATION:Pressing the transmitter’s button halfway issues a half-press signal. While holding the transmitter’s button in this position the green LEDs on the transmitter and receiver stay on, and the camera (if it’s set to auto-focus) will auto-focus during this period.If you release the transmitter’s button suring this period: the green LEDs go out, the camera stops attempting to auto-focus, and nothing further happens.Pressing the transmitter’s button fully, issues a click (a full-press signal almost immediately by a release). The LEDs on both the transmitter and receiver will blink red one time. Even if you continue to hold down the transmitter’s button, nothing further happens.Releasing the transmitter’s button causes nothing further to happen.During this entire process the LCD displays the RF channel (it never changes).____________________________________________________________CONTINUOUS MODE (press, hold, release)SETUP:Select Continuous mode.The LCD will display the current wireless channel.OPERATION:Pressing the transmitter’s button halfway issues a half-press signal. While holding the transmitter’s button in this position the green LEDs on the transmitter and receiver stay on, and the camera (if it’s set to auto-focus) will auto-focus during this period.If you release the transmitter’s button suring this period: the green LEDs go out, the camera stops attempting to auto-focus, and nothing further happens.Pressing the transmitter’s button fully, issues a full-press signal. The LEDs on both the transmitter and receiver turn red. The virtual shutter button remains pressed, and the LEDS stay red, until you release the transmitter’s button.Releasing the transmitter’s button issues a release signal, and the red LEDs on the transmitter and receiver to go out.CAMERA BEHAVIOR:o If the camera is set to single-shot, then it will simply take a single shot to matter how long the shutter button is held down.o If the camera is set to continuous shooting, then it will take repeated shots, at whatever rate the camera is set for, until you release the transmitter’s button or the camera reaches its continuous shooting limit.o If the camera is set to bulb mode, then it will take a single exposure, and leave the shutter open for as long as you hold down the transmitter’s button.During this entire process the LCD displays the RF channel (it never changes).____________________________________________________________BULB MODE (click to start, click to stop)SETUP:Select Bulb mode.The LCD will display a timer set to zero: 00h 00m 00s.OPERATION:Pressing the transmitter’s button halfway issues a half-press signal. While holding the transmitter’s button in this position the green LEDs on the transmitter and receiver stay on, and the camera (if it’s set to auto-focus) will auto-focus during this period.If you release the transmitter’s button suring this period: the green LEDs go out, the camera stops attempting to auto-focus, and nothing further happens.Pressing the transmitter’s button fully, issues a full-press signal. The LED on the receiver turns solid RED, and the LED on the transmitter starts blinking RED. The virtual shutter button remains pressed even if you release the transmitter’s button. A Timer on the LCD starts counting up (from 0s to 99h 59m 59s) to show how long the virtual shutter button has been pressed.Releasing the transmitter’s button causes nothing to change.Pressing the transmitter’s button (half or all the way) issues a release signal, the timer stops counting up, and the LEDs to turn off.CAMERA BEHAVIOR:o If the camera is set to single-shot, then it will simply take a single shot to matter how long the shutter button is held down.o If the camera is set to continuous shooting, then it will take repeated shots, at whatever rate the camera is set for, until the virtual shutter button is released or the camera reaches its continuous shooting limit.o If the camera is set to bulb mode, then it will take a single exposure, and leave the shutter open for as long as the virtual shutter button is pressed.____________________________________________________________SELF-TIMER MODE (delay then click(s) )SETUP:DELAY specifies (from 01s to 59s) how long to wait before issuing the first click.COUNT specifies (from 1 to 99) how many times to click the shutter (after the delay).OPERATION:Pressing the transmitter’s button halfway issues a half-press signal. While holding the transmitter’s button in this position the green LEDs on the transmitter and receiver stay on, and the camera (if it’s set to auto-focus) will auto-focus during this period.If you release the transmitter’s button suring this period: the green LEDs go out, the camera stops attempting to auto-focus, and nothing further happens.Pressing the transmitter’s button fully starts the delay countdown. When the countdown completes, the shutter button will be clicked a specified number of times.CAMERA BEHAVOIR:The camera does whatever it’s set to do when you click the shutter button.NOTES:o If multiple clicks are issued, they happen pretty rapidly. If a slow shutter speed is set, the camera may miss some of the clicks.____________________________________________________________INTERVALOMETER MODE (a series of timed exposures)SETUP:N1 specifies how many times (from 1 to 999 times) the virtual shutter button is to be pressed during each basic sequence.LONG specifies how long (from 00s to 99h 59m 59s) the virtual shutter button is to be held down during each press.INTERVAL specifies how long to wait (from 01s to 99h 59m 59s) between virtual shutter button presses (between the release of one and the press of the next).Those three settings define the basic sequence.N2 specifies how many times (from 1 to 999 times) to repeat the basic sequence (or set it to “–” to repeat forever).REPEAT specifies how long to wait (from 01s to 99h 59m 59s) between repeats of the basic sequence.DELAY specifies how long to wait (from 0s to 99h 59m 59s) before starting the first run of the basic sequence.Note that a half-press will be performed for the two seconds preceding every full-press.EXECUTION:Select any intervalometer setting.Press the PLAY button to start the specified sequence.Press the STOP button to stop it.While playing, the LCD will display the currently executing segment of the sequence (DELAY, LONG, INTERVAL, REPEAT) and how much time (or how many counts) are left in that segment.(what do the LEDs do?)CAMERA BEHAVIOR:Each time the device presses or releases the virtual shutter button, the camera will do whatever it would do if a finger pressed/held/released the physical shutter button.NOTES:o What the camera does during the LONG time while the shutter button is being “held down” depends upon your camera settings. If the camera is in continuous shooting mode, then it will repeatedly take pictures until the LONG period expires and the timer “releases” the shutter button. Or, if the camera is in bulb mode, the shutter will remain open for the entire LONG period. If the camera is not in one of these special shutter modes, then the camera will just take a single shot each time the shutter is pressed, using whatever P,A,S,M settings the camera is set for.o If you have the camera on bulb, then the camera will probably refuse to take another picture until after a delay that is at least as long and the LONG period. Many cameras use this delay for noise reduction of long exposures. Therefore you will often need to set INTERVAL to be a longer period than the LONG period — otherwise the timer will send another shutter press to the camera before the camera is ready to respond to it.EXAMPLE 1:Let us say you want to take a 20m exposure of a scene. The camera is set on a tripod and you want to let vibrations settle for 5s before starting the exposure.DELAY = 5sN1 = 1N2 = 1LONG = 20mINTERVAL = (ignored)REPEAT = (ignored)EXAMPLE 1:Let us say you want to take star trails. You want to take 100 exposures, each exposure to be 15s long, and you need to leave 15s between exposures for the camera’s noise reduction process plus 2s to save to the memory card. Let’s say you’re not worried about initial tripod vibrations.DELAY = 0sN1 = 100N2 = 1LONG = 15sINTERVAL = 17sREPEAT = (ignored)
Robert S. –
Problem Solved
I have both the infrared remote control and the WiFi interface for my Nikon cameras (D7100 and Z5). The WiFi allows operation with a cellphone or tablet application. That said, the infrared remote control has a range of about 5 meters, the WiFi has a range of about 10 meters. All good, BUT I needed a range of about 30 meters, 100 feet or so.Problem: Camera was placed on front railing of mezzanine in a theater, while I’m on stage.So, this remote control solved this problem completely. Easy to set up. Both ends can be set to remain active up to 30 minutes, allowing plenty of time for getting the camera end turned on, then returning to the stage, posing folks, and so on. Great remote at a very reasonable price.
Guy Hawkins –
Easy Setup; Great with Nikon D700 AND D7100
I only received this device yesterday, so there’s more exploring to do; but right now, I’m happy that it works great with my Nikon D700. I’m very pleased with it, so far! I tried it with my D7100, and was less impressed, but I need to “study on it” a bit more; I suspect I’ll be just as pleased with it on the D7100, after I’ve experimented more.It appears to be well-built and durable…plastic, yes, but durable none-the-less. Connections feel sure and solid.I’d like to buy the FJ connector cable to try this with my Fujifilm X100s.I’ll write further, after a few more weeks of use and experimentation.Aug 13, 2022. This remote shut’er release is fantastic. Five stars all day long!!!May 12, 2024 Continues to work reliably. No problem with this device. Still a 5-star purchase for me!
Veronica W –
Great for photo but doesn’t support video on d500
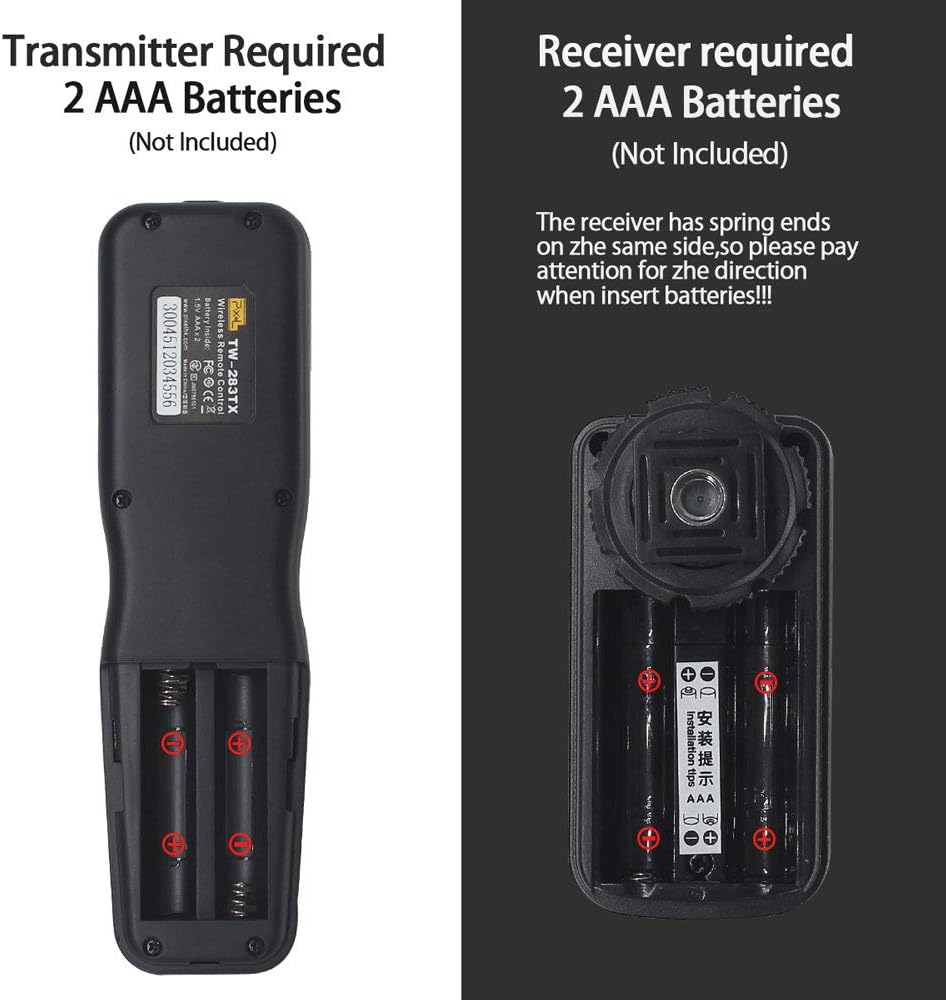
This is a good product and it does work. However I bought it to do the wireless shutter release for my video in Nikon D500 and was bummed by the fact that it didn’t work. Just the photo but not the video. I’m guessing that this camera wasn’t designed for video and no shutter release will work with it ..My return was accepted. So I think it was nice for them to do so.PS you need 4aaa batteries for it to work!
Nicolas Rodriguez –
Funciona muy bien tengo uan Panasonic LUMIX G3
Greg Flick –
Should have purchased this remote years ago. It functional, works well and makes remote photography so much easier.YouTube the set up for programming multiple shots with pauses and delays. The instructions are clear but the YouTube video is faster to comprehendThe receiver is tight when attaching it to shoe, so I only slide it half way on. When I use strobes, or multiple flashes – I let the receiver dangle by the wire. Moving forward I have to find a better solutionBottom line the remote works really well and it also works well when also using a flash (strobe) controller
Paul –
Does the job very well
RKN –
Working fine, no issue; took a little time to understand how to operate the system.
Gautham Rachaiah –
Since rating 1 is the lowest I gave 1. I have used this product twice till now. I can see receiver is not working.